Getting started - Bria Solo
Welcome to Bria Solo!
Make sure you have the information about your PBX or SIP server that you would like to use with BriaSolo, such as SIP server URL/domain, SIP username, and SIP password. You need it during the signup.
-
Sign up for Bria Solo on the Bria Solo Portal using the latest versions of Chrome, Edge, Firefox, Internet Explorer, or Safari.
Remember the email address and password you chose. You will use it later when logging into the Bria client.
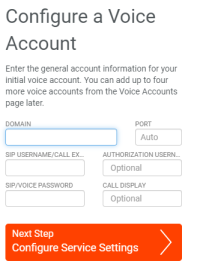
The Welcome to Bria Solo pop-up opens.
-
Follow the prompt to set up your Voice account in Bria Portal. Here you enter a domain of your SIP server, username and password. Follow the prompt to complete the setup.
- Download the Bria client on your computer. On mobile devices, go to App Store or Play Store and search for Bria.
-
Log into the downloaded client using the email address and the password you chose when signing up for Bria Solo.
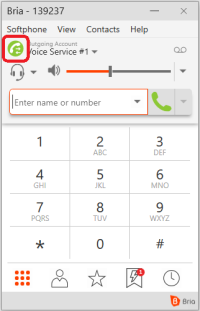
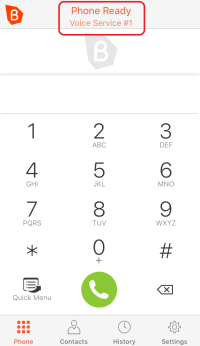
After you log into a Windows or Mac client, a green icon indicates that the account is connected. On Android or iOS, Phone Ready appears on the dialpad.


More information
Read this topic if you need to change SIP server settings such as Proxy or Firewall method.
Read this topic if you have strict firewall rules. You might need to open ports on your network and change firewall rules.