Importing contacts
You can populate Bria’s contacts by importing an external file or files. Your system administrator may have placed a file on the server for you to import. You can also import your own file or files. New contacts will be added to existing contacts.
You can import a contact list from:
- .csv file: A comma-separated value file. Use this method to import from a Microsoft® Excel® file.
- vCard file (*.vcf file): A vCard is an electronic business card that is often attached to an e-mail.
- .pst file: (Windows) A Microsoft Exchange® contact list (*.pst file).
- Mac Address Book: (Mac) A Mac contact list.
If you add your Outlook account or Mac Address Book account, you do not need to import your Windows or Mac contact lists.
- Remove any introductory text or headings from the to of the file. You can keep the text at the end of the file as it will be ignored during import.
-
Insert a blank row as the first row. In the next row, insert the heading that Bria will use to interpret the meaning of each column. The columns can be in any order. The key heading are:
-
sip-address: Bria recognizes a value in this column as a softphone address and considers the address as one that can be phoned and one that can be using for IM and presence (if SIP is being used for IM and presence).
-
xmpp-address: Bria recognizes a value in this column as a Jabber (XMPP) address and will map this field to the Instant Message field for the contact.
-
display-name, given-name, and surname
-
business_number
-
presence_subscription: Complete this field in one of these ways:
If you only want to share presence information with some of your contacts, fill in this column in the file. Enter "true" for contacts whose online presence you want to see. Leave this column blank or enter "false" for others. During the import, you will be able to choose to share presence with only the contacts that have "true". Bria will subscribe to the presence for "true" contacts assuming that the user has a SIP account (if SIP is being used for IM and presence).
If you want to share presence with all or with none of your contacts, ignore this heading. During the import you will be able to choose whether to share will all or none of your contacts.
For a complete list of headings, see Contact list headings.
-
-
Save the file as "*.csv".
The file is now ready for import.
-
On the Contacts menu, click Import Contacts.
-
Select the file type — Comma-separated values (*.csv file), vCard (*.vcf file), or Outlook or Exchange server (Windows only) — and click Next.
-
Enter the location of the file and click Next.
-
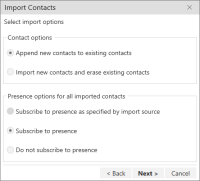
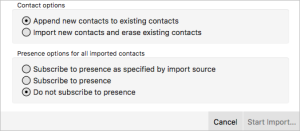
Set the Contact Options and the Presence options for all imported contacts and click Next.
Bria imports the contacts that are in the file.
-
On the Contacts menu, select Import Contacts.
-
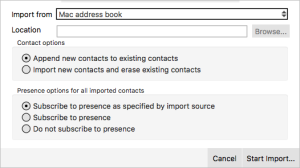
Use the drop-down list to select Mac address book in the Import from field and leave Location blank.
-
Set the Contact Options and the Presence options for all imported contacts and click Start import.
-
Select the individual contacts you want to import or select the check box for Select all contacts.
-
Click Import.
Bria imports the contacts that are in the file.


 ® logo are registered trademarks of CounterPath Corporation.